| 本文档讲述内容与代码示例可参见 Shoulder-Demos |
在 Shoulder 中使用 数据库、Redis,您甚至不需要部署他们的 Server 端,Shoulder 为这部分场景提供了开箱即用的内嵌运行方案!这对 学习、项目试运行、集成测试 等场景十分受用,无需部署相关服务即前使用相关功能或提前验证。
嵌入式数据库 H2
Shoulder 仅提供了 H2 数据库的版本管理,以下这些能力均由 Spring 提供,可参考 Spring Boot 数据库初始化文档 或搜索 SpringBoot 中使用 H2。
数据库相关依赖
确保您已经引入数据库相关依赖,以具备连接数据库能力,如 shoulder-data-db(这将包含必要的 JDBC 驱动、Hikair 连接池、Mybatis-Plus 扩展):
<dependency>
    <groupId>cn.itlym</groupId>
    <artifactId>shoulder-starter-mysql</artifactId>
</dependency>compile 'cn.itlym:shoulder-starter-mysql'引入 H2 依赖:
引入以下依赖即可,无需填写版本号
<dependency>
   <groupId>com.h2database</groupId>
   <artifactId>h2</artifactId>
</dependency>compile 'com.h2database:h2'配置激活 H2
spring.datasource.type=com.zaxxer.hikari.HikariDataSource
spring.datasource.url=jdbc:h2:mem:demodb;DATABASE_TO_UPPER=false;MODE=MYSQL;
spring.datasource.username=shoulder
spring.datasource.password=shoulder
spring.datasource.driver-class-name=org.h2.Driverspring:
datasource:
# Spring 默认连接池
type: com.zaxxer.hikari.HikariDataSource
# 以内促模式启动,数据库名称为 demodb,连接参数..
url: jdbc:h2:mem:demodb;DATABASE_TO_UPPER=false;MODE=MYSQL;
username: shoulder
password: shoulder
driver-class-name: org.h2.Driver
若您希望在应用停止后仍保留数据库内容,可以使用 H2 的 “文件模式”:调整上述 url 配置为 url: jdbc:h2:file:~/demodb;DATABASE_TO_UPPER=false;…
|
H2 提供了一些连接参数,如
-
DATABASE_TO_UPPER=false表示维持表名、表字段列名的大小写,而不会统一转换为大写; -
MODE=MYSQL表示尽量兼容MySql;
更多 H2连接参数 参见 H2 官方文档
|
Spring 助力:数据库初始化
Spring-Data 提供了 SQL 脚本的初始化功能,您可以在 application.yml 中配置可使应用在启动时自动创建表结构、初始化数据:
spring.sql.init.platform=h2
spring.sql.init.mode=ALWAYS
spring.sql.init.continue-on-error=false
spring.sql.init.schema-locations=classpath:schema.sql
spring.sql.init.data=classpath:data.sql
spring.h2.console.settings.web-allow-others=truespring:
sql:
init:
# 数据库类型
platform: h2
# ALWAYS 每次都执行;EMBEDDED:为H2:mem模式作地定制,仅在该模式下生效;NEVER:不执行SQL
mode: ALWAYS
# SQL 报错了要不要抛异常,还是继续执行
continue-on-error: false
# 表结构脚本位置
schema-locations: classpath:schema.sql
# 初始化数据脚本位置
data-locations: classpath:data.sql
以上配置提到了 schema.sql、data.sql 两个文件,请需要确保文件在 resources 目录下 存在,Spring 将在启动时执行他们。
|
可视化的管理页面
通过以下配置即可开启 H2 提供的 HTML 页面
# 开启 http 页面访问数据库内容
spring.h2.console.enable=true
# 开启的 http 页面允许其他ip机器访问
spring.h2.console.settings.web-allow-others=truespring:
h2:
console:
enabled: true
settings:
web-allow-others: true设置启动后,访问 http://localhost:8080/h2-console ,输入您配置的 数据库url 用户名、密码 登录。
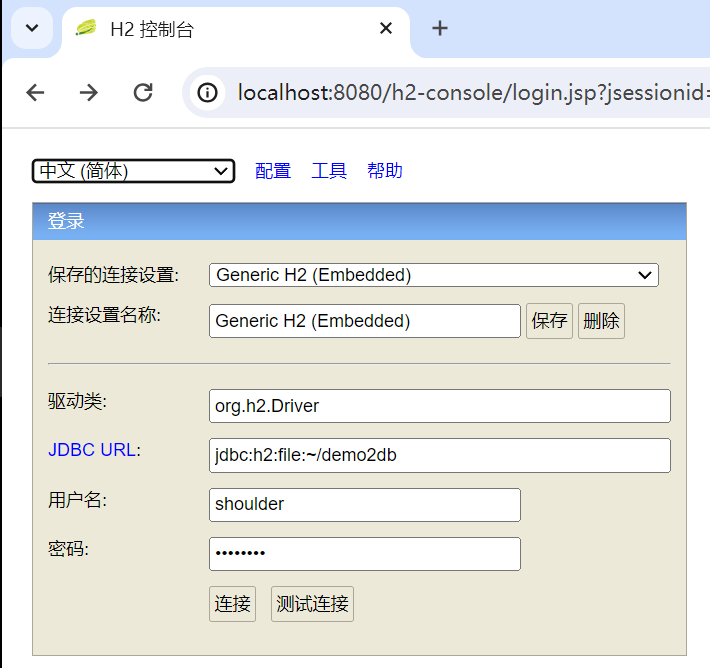
左上角可以调整语言信息,如调整为中文;这个界面不仅可连接 H2,还可以连接 Mysql、Postgresql 等。
|
登录后可以看到 H2 提供了一个简单的 UI 管理界面,即可查看数据库中的表结构,编写 SQL 查看数据库内容。
| 该章节工程示例可参见 Shoulder-Demo2 |
内嵌式 Redis
Redis 相关依赖
确保您已经引入 Redis 的相关依赖,以具备连接 Redis 能力,如 spring-boot-starter-data-redis
<dependency>
    <groupId>org.springframework.boot</groupId>
    <artifactId>spring-boot-starter-data-redis</artifactId>
</dependency>compile 'cn.itlymorg.springframework.boot:spring-boot-starter-data-redis'引入 embedded-redis 依赖
引入以下依赖即可,无需填写版本号
<dependency>
   <groupId>com.github.codemonstur</groupId>
   <artifactId>embedded-redis</artifactId>
</dependency>compile 'com.github.codemonstur:embedded-redis'配置激活 Redis
接下来,在任意配置类上添加 @EnableEmbeddedRedis 注解,即可让内嵌 Redis 运行起来!
以下是访问内嵌 Redis 的全部示例代码
// --- 加入 @EnableEmbeddedRedis 激活内嵌 Redis 服务器!!
@EnableEmbeddedRedis
@SpringBootApplication
public class MyApplication implements ApplicationListener<ContextRefreshedEvent> {
// -------- 访问 Redis 测试 ---------
// 尽情使用您习惯的访问 Redis 方式
@Autowired
private RedisTemplate redisTemplate;
@Override
public void onApplicationEvent(ContextRefreshedEvent event) {
// 测试访问 Redis
redisTemplate.opsForValue().set("myKey","myValue");
System.out.println(redisTemplate.opsForValue().get("myKey"));
}
// -------- 访问 Redis 测试 ---------
public static void main(String[] args) {
SpringApplication.run(MyApplication.class, args);
}
}
这将在启动 Spring 上下文之前,在本地 3306 端口启动一个嵌入式 Redis 服务器,且在上下文关闭后将自动停止它,请尽情使用!
必要的 Spring Data Redis 属性已由 Spring 默认设置,相当于以下内容:
|
spring.data.redis.host=127.0.0.1
spring.data.redis.port=6379spring:
data:
redis:
host: 127.0.0.1
port: 6379
若您希望定制 Redis 的启动参数,可以参考 Github:embedded-redis
|
| 该章节工程示例可参见 Shoulder-Demo5 |
技术选型说明
Shoulder 经过对 Github 上几十个嵌入式 Redis 项目的分析和验证,最终确认选型为 com.github.codemonstur:embedded-redis
筛选条件:
-
代码、版本 活跃度:最最近版本在最近2年内(支持Redis5等主要版本)。
-
可用性:可以在
maven 中央仓库引用使用。 -
支持的操作系统:支持
Linux、Windows、Mac。
最终筛选结果为 embedded-redis(embedded-redis 的一个活跃 fork 分支) ,且有些知名的开源软件也依赖该项目,并在最近几周有相关更新,如 Appache Dubbo 等,请放心使用。
更多嵌入式 / 轻量技术
Mock 其他应用 & 接口调用
推荐以下开源技术:
启动独立可配置的 HTTP Server 模拟服务提供方
-
-
Java开发,JSON形式mock配置文件。应用广泛、强大的功能集(包括存根定义、请求验证、匹配逻辑等)、易于集成到JUnit测试中,以及良好的文档和社区支持,WireMock成为Java项目中进行HTTP服务模拟的首选。
-
-
-
Java开发,允许 HTTP 动态设置mock规则。提供了高度可配置的HTTP和HTTPS请求的模拟和验证能力,适合需要细致控制模拟逻辑和复杂验证场景的项目。它的灵活性和对企业级特性的支持使其成为一个强有力的选择。
-
-
-
Java开发,JSON形式mock配置文件。凭借其简洁的配置方式和易于启动的特性,Moco非常适合快速搭建开发和测试环境中的HTTP服务模拟。对于追求快速原型和简单配置的团队来说,Moco是一个很好的选择。
-